Are you considering installing laminate flooring yourself?
You may have noticed with properly installed flooring that the joins are not aligned up in a straight line and are actually ‘staggered’. The same method applies to brickwork. But, do you know why they are staggered?
In this guide, we explain how to stagger laminate flooring step by step and the reasons behind it.
Why do you have to stagger laminate flooring?
The reasons for staggering the laminate flooring are:
Strength and stability
Staggering the joints distributes the weight and stress evenly across the floor, adding strength and structural stability. If they are all lined up in one line it would make the joints weaker.
If they are not staggered, it could lead to premature damage or wear and affect the longevity of the flooring.
Aesthetic appeal
The staggering of the planks makes it much more pleasing to the eye. It recreates the uneven wood pattern, giving a much more natural, authentic finish.
What happens if you don’t stagger laminate flooring?
If you don’t stagger the flooring, the floor will be less structurally sound, which increases the risk of damage or separation of the planks.
While subjective, not staggering the flooring can result in an odd and repetitive appearance, which can affect a home’s cosiness.
How to stagger laminate flooring
1. Plan the layout
First, you will need to decide which direction to lay your planks in. Installing them parallel to the longest wall in the room is the most popular option, as it creates a more spacious look.
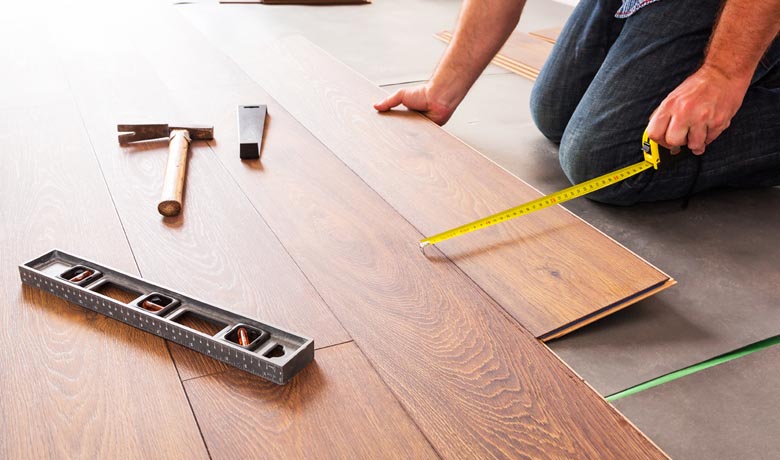
2. Start with a full-length plank
Begin by laying the first row with a full-length plank along the longest wall, starting in the corner. Place this plank with its tongue facing the wall, leaving a small expansion gap (approximately 10 – 12mm or as recommended by the manufacturer) between the plank and the wall.
Laminate tends to expand and contract with temperature and moisture changes, so it is important to leave a small gap. Otherwise, the flooring could become unstable and not last as long.
Insert the second laminate plank adjacent to the first and continue placing full laminate planks alongside the wall.
3. Cut the last laminate plank in the first row
You might need to cut the last plank in the first row to fit against the wall – remember to leave that expansion gap!). Use a saw to make precise cuts.
4. Start the second row
Begin the second row parallel to the first but with a shorter plank to stagger the seams. The end joint of the second row shouldn’t line up with the end joint of the first row.
As a guideline, offset the end joint of the second-row plank by at least 6 inches from the end joint of the first-row plank.
5. Continue installing rows
Repeat the above process, making sure to stagger the joints of each row. As you progress, you may need to cut the planks at the end of each row or around any doorways.
To avoid waste, you can use what you cut off one end to start another row.
6. Finishing touches
Once you have finished the installation, you must install any necessary beading or skirting to cover the expansion gaps and give a sleek finish.
FAQ
How to stagger laminate flooring in a hallway?
Staggering laminate flooring in a hallway follows the same principles as any other room, therefore we would suggest following the same process as above, starting with planning the layout.
Laminate flooring in hallways usually looks best when it runs lengthwise down the hallway, as it makes the hallway look longer. However, you can install it perpendicular to the hallway for a different look.
However, if you have a hallway connecting to another room and want laminate flooring to run throughout, it is best to lay the laminate flooring the same way as the other room for aesthetic appeal.
If you wish the laminate flooring to be laid in one direction in one room and a different direction in the hallway, you would need to put a threshold or transition strip where they connect.
We hope this guide has helped you learn how to stagger laminate flooring.
However, if you’re worried about doing it wrong or don’t have the time, why not hire a professional floor fitter to do the job properly?
Looking for more information on laminate flooring? Our laminate floor fitters guide contains everything you need to know in order to accurately plan the work.
Want to get a rough idea of how much it’s going to cost? My Local Toolbox has put together a laminate flooring installation cost guide which considers the many factors involved; materials, labour, and other outlays.
Want to get accurate quotes for your flooring project? Post a job now to compare quotes from floor fitters near you.